

But as workflows grow, testing them top down can get difficult. How can I test the last stage of a workflow, when there are several stages before that? It may mean running thorough a complex procedure before being able to view the contents of a notification that is sent out as a final step. Potentially, it means disabling groups of controls during testing and then remembering to re-enable them afterwards.
The impacts of a top-down design can be felt in a production environment when a workflow faults due to an error. If a workflow is restarted at the beginning, then users may need to respond to approvals for a second time, creating confusion or distrust of the process.
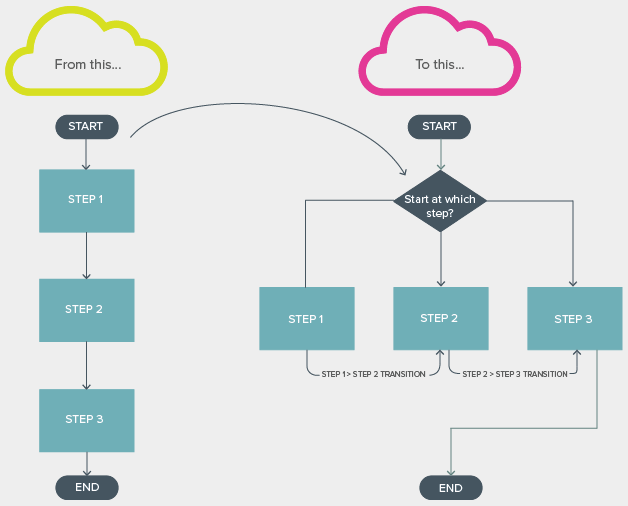
Flatten a workflow to add control
An alternate method of designing the workflow is using functional branches. Functional branches break up a long workflow into steps that can be executed independently. This allows us to test any step of a process without relying on the completion of earlier parts, and to restart workflows without going through unnecessary duplicate approvals.
This tutorial will go over a workflow design idea that helps to improve testability of workflows and make failure recovery more straightforward.
State machines are useful, with one shortfall
To those familiar with Nintex, the drawing above may remind them of a commonly used action – the state machine. In Nintex, state machines hold a series of states in branches and allow transitioning from one branch to another using a change state action and logic implemented by the workflow designer. A top down workflow can be rebuilt as a state machine to increase the readability and potentially reduce the logic necessary to execute a process.
State machines rely on moving from one state to another by going through the following process:
- Create a list of possible states within the state machine by entering them in the state machine action
- Dropping a change state action into Nintex designer
- Use the dropdown menu to select a state from the one available.
What state machines lack is the ability to transition states based on the value of a variable, which means that they can’t interact directly with SharePoint lists. This creates both benefits and drawbacks:
+ State machines do not need to wait for item update to transition states
+ State machines can execute independently of what is happening on the list item
- State machines do not natively provide visibility on the list (or, therefore, in a form) about the workflow status
- State machines do not support interactivity with a user’s actions
In order for us to move beyond state machines, we need to value the interactivity that the state machines lack and accommodate for the costs of moving away from them.
An alternate design: Switch and Loop
Placing a switch within a loop and connecting the switch to a list column gives us the ability to control what branch a workflow should execute next, and also view this execution directly from a list.
Below is a tutorial describing how to create a Switch and Loop design. Once this tutorial has been completed, you’ll have a workflow that displays the current status on a list, and can be started at any branch in the process. The remainder of this tutorial covers how to build this design and some notes about its use.
If you’d prefer, you can grab the workflow export and the associated list to see the workflow in action.
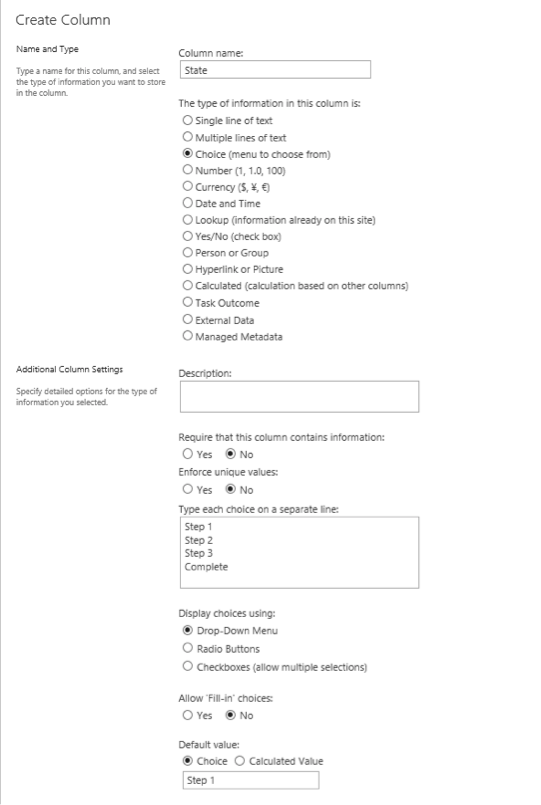
So, to start create a choice column on a list with Four options: Step 1, Step 2, Step 3, and Complete.
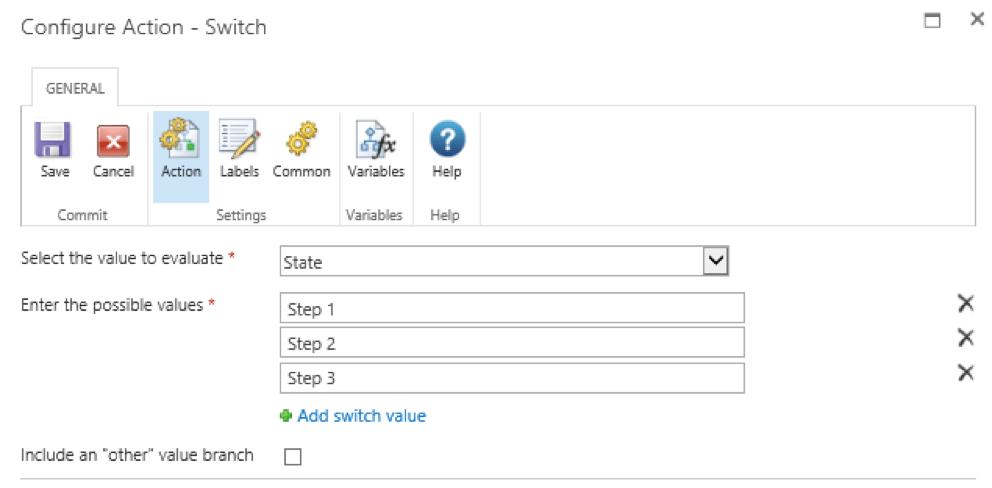
Next, create a new workflow and drop in a switch action that evaluates based on what is contained in the choice column you just created. Set the possible values to the first three choices you created.
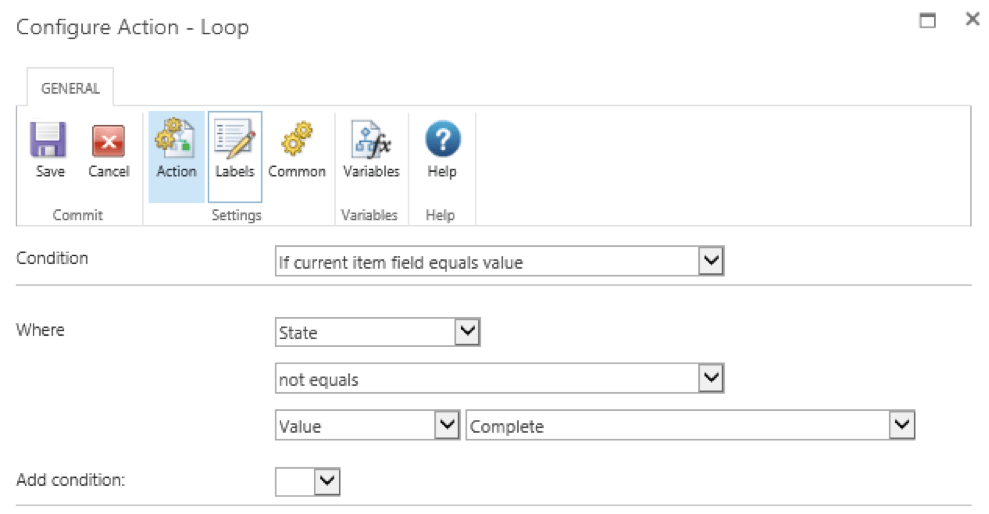
Now drop in a loop action that keeps on looping while the column you created doesn’t equal Complete.
And then, put the switch into the loop.
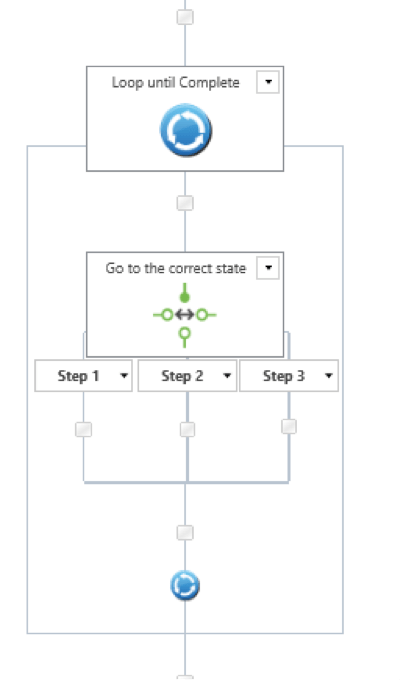
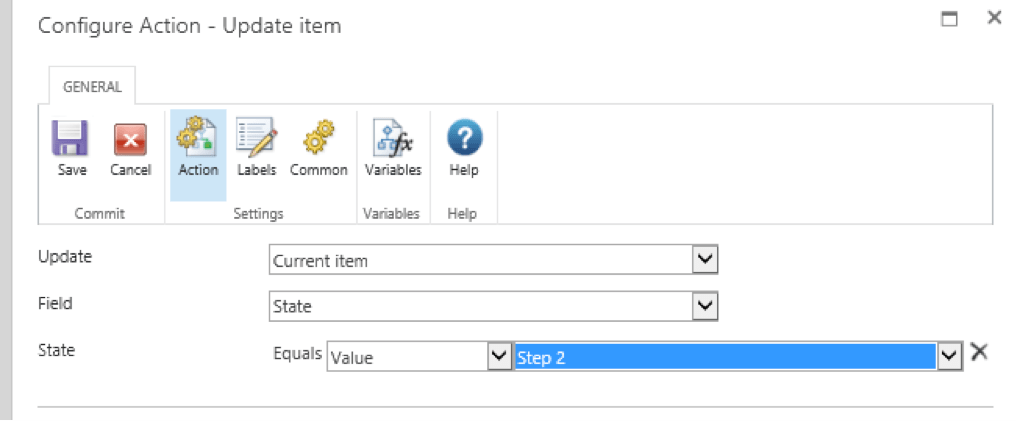
The last thing we need to include to make this setup work are transitions. Using the update item action, we can set the branch the switch action should execute next.
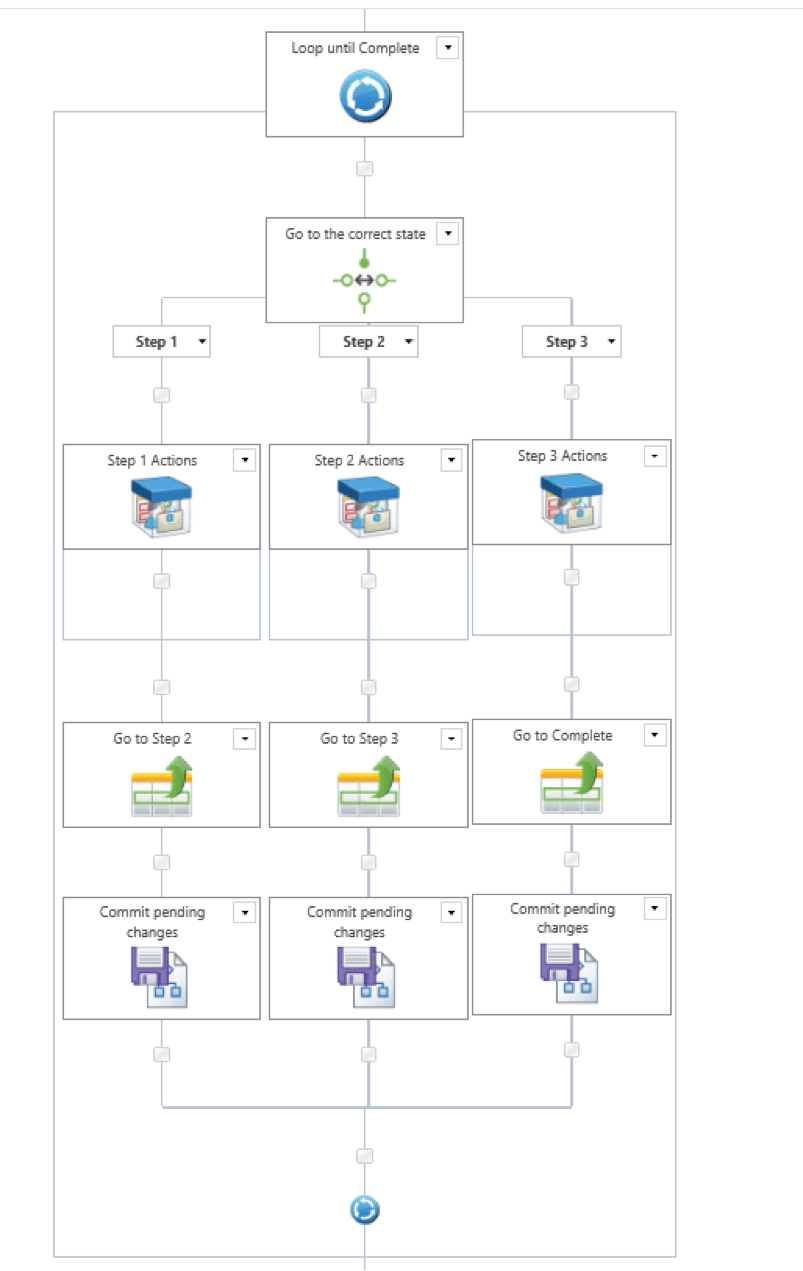
And with all the transitions build in, it should look something like this.

For extra credit
With the steps above, you’ve created a workflow that can be started at any branch by setting the State column on the item. There is one other feature that can be added that might assist in testing the process or recovering from workflow failure, which is a start mode.
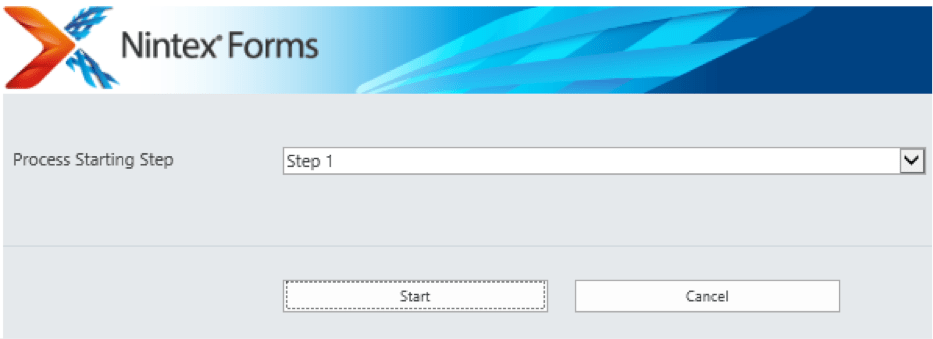
A start form can allow you to start from a desired state easily.
In order to create one, go to Workflow Settings -> and then click on Edit Start form in the ribbon. Here, you can link a choice control with your column so that you can kick a workflow off from whatever state you’d like without having to edit the State column before running the workflow.
It should be noted that a start form only makes sense in this instance if the workflow starts automatically. This level of control is typically appropriate for administrators of a process or a support desk, rather than business users, given the possibility of skipping over necessary parts of a process.
With a few empty action sets added, and commit pending changes included to ensure the values are available in the list column when read, it looks like this:
Wrap up and gotchas
This tutorial covered an alternate design for workflows that I have used in a number of larger solutions. There are benefits to this approach, but it needs to be used with care. The update item method can generate errors on a list if multiple updates happen in a short period of time. Also, since the switch is reading items from a list, it’s important that you design in sufficient time for the data to be written to the list before the switch accesses it. I included the commit pending actions shape to accommodate for this.
Depending on the complexity of your workflow, certain fields may be set in an earlier step that you may need access to later on. As opposed to the top down design, it is important to take note of what data needs to be accessible by the workflow and put it before the loop so that the relevant variables are initialized before start.
Find the List template and the related workflow.
*See part two of this post, which demonstrates extended state machines, for an alternate implementation of this design idea


